Download and install Postgresql 14 on Linux CentOS/RHEL 8/7 TAR

Hello colleagues.
In this article, we will discuss how to install a PostgreSQL database server on Linux from source. At the time of this writing, the latest version of the PostgreSQL database is 14.1.
PostgreSQL is an open source generic object-relational database management system that is a real alternative to commercial databases. The query language uses SQL.
The content of the article:
- Install the necessary packages.
- Create a local user on the server named postgres.
- We create the necessary directories.
- Downloading the database archive.
- Unpack the archive.
- Install the DBMS source files.
- Building PostgreSQL.
- Database installation.
- Database cluster initialization.
- Editing postgresql.conf and pg_hba.conf configuration files.
- Create a configuration file bd_conf.conf.
- We create our environment for the database.
- We start the database.
- Bathhouse database management console.
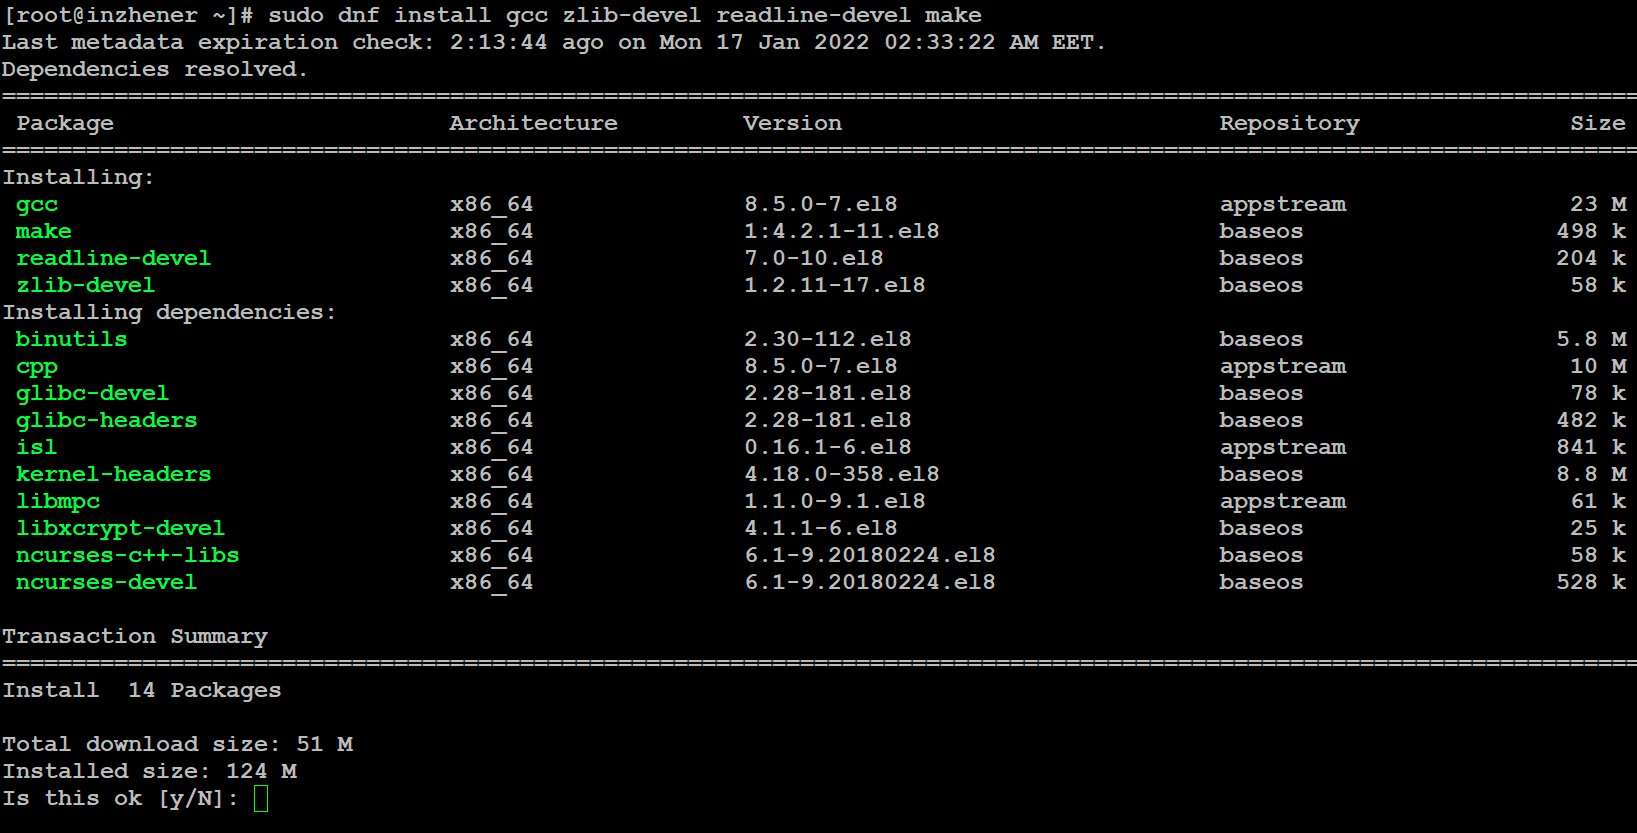
STEP 1. Install the necessary packages.
Before installation, it is necessary to install important packages without which the installation of the database itself will not be possible.
$. sudo dnf install gcc zlib-devel readline-devel make
STEP 2. Create a local user on the server named postgres.
Create a postgres user and set a password for it.
$. sudo useradd postgres
$. sudo passwd postgres

STEP 3. Create the necessary directories.
We create directories where the subd and the database will be stored.
$. sudo mkdir -p /app/postgresql
$. sudo mkdir -p /app/postgresql/pgdatabase/data
$. sudo mkdir -p /app/postgresql/pgdatabase/log
Enough for now, then there will be another directory with utilities for managing the database.

Now let's assign the new postgres owner we created to the /app root directory.
chown -R postgres:postgres /app

STEP 4. Download the database archive.
We will download the database archive on the official website.
https://ftp.postgresql.org/pub/source

STEP 5. Unpack the archive.
All further actions are performed under the postgres user.
After downloading the archive, move it to the /app/postgresql directory.

Now it starts to unpack the archive itself.
tar -xvf postgresql-14.1.tar.gz

After unpacking, we get the postgresql-14.1 directory.

Change the name of postgresql-14.1 to build. And now we can delete the archive itself.
mv postgresql-14.1 build
rm postgresql-14.1.tar.gz

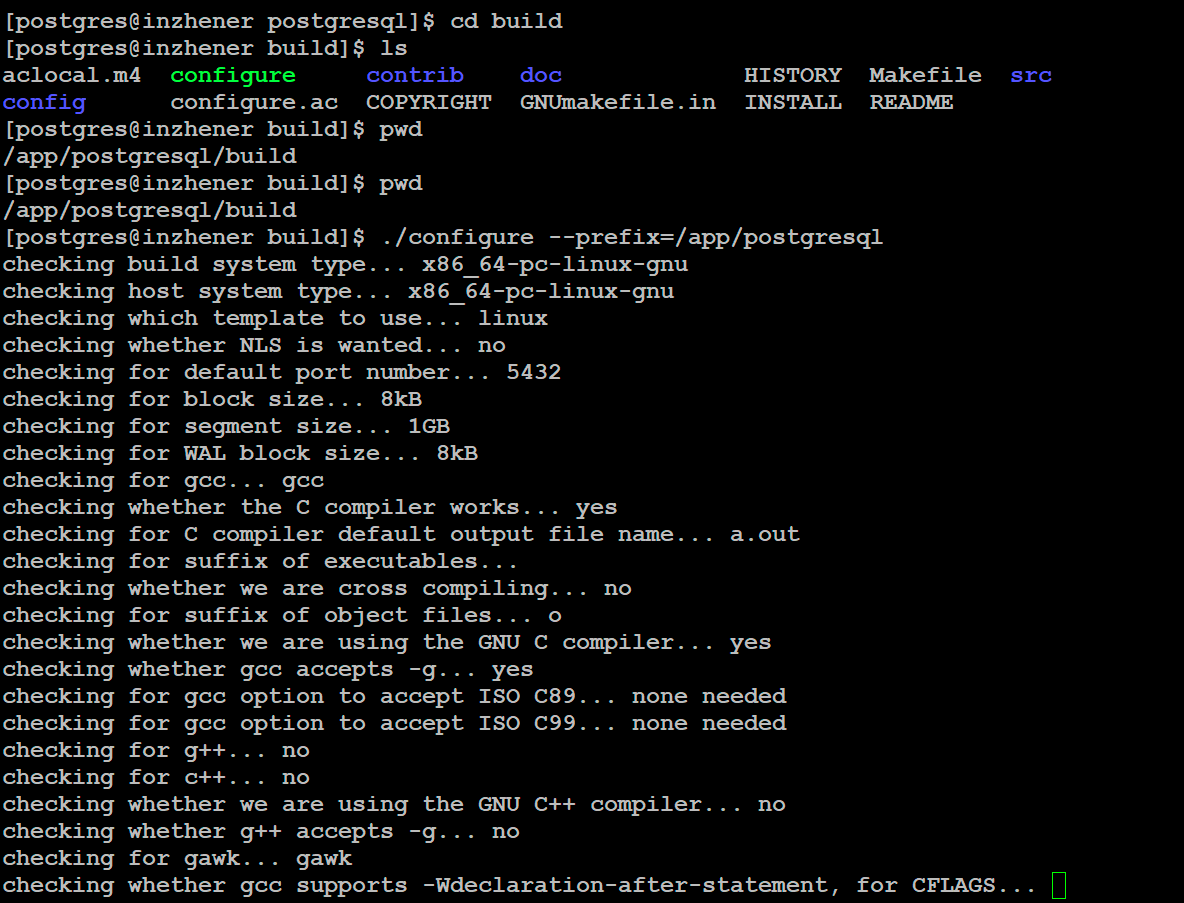
STEP 6. Install the DBMS source files.
In the /app/postgresql/build directory, run:
/app/postgresql/build/configure --prefix=/app/postgresql
STEP 7. Building PostgreSQL
We collect the DBMS from the source files. The assembly procedure will take about 5 minutes.
make world

STEP 8. Installing the database.
After the assembly, we begin the process of installing the database itself.
make install-world

STEP 9. Initialize the database cluster.
Initialization is the process of creating all the necessary directories for the database itself.
/app/postgresql/bin/initdb -D /app/postgresql/pgdatabase/data/ -U postgres -W
In the process, it will ask you to enter the password from the postgres super user of the postgres database.

STEP 10. Editing the postgresql.conf and pg_hba.conf configuration files.
postgresql.conf is the main database configuration file.
pg_hba.conf - used to configure access to the database.
The files are located in the directory - /app/postgresql/pgdatabase/data
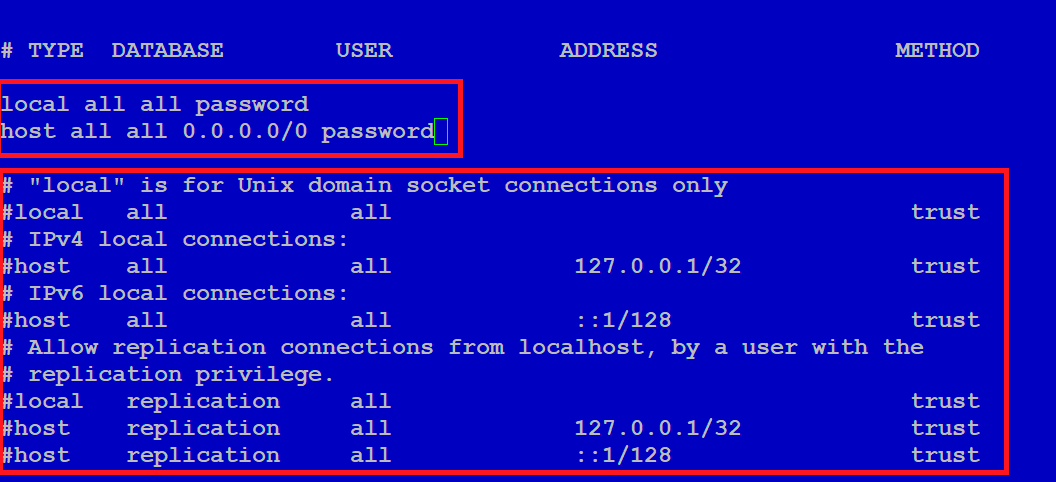
In the pg_hba.conf file, comment out all the parameters, and add the text below:
local all all password

host all all 0.0.0.0/0 password
In the postgresql.conf file, find the include_if_exists parameter and add the bd_conf.conf values to it.
This means that we, as it were, supplement the main configuration with another configuration file for our convenience to add parameters or change them.

STEP 11. Create a configuration file bd_conf.conf.
Now we need to create this bd_conf.conf file and add the minimum number of parameters to it so that the database starts without errors.
Create a bd_conf.conf file in /app/postgresql/pgdatabase/data.
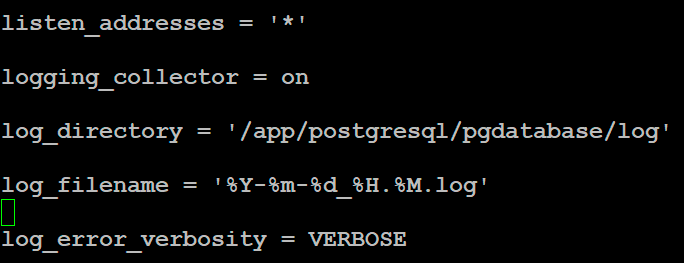
vim bd_conf.conf and paste the parameters into it:
listen_addresses = "*"

logging_collector = on

log_directory = "/app/postgresql/pgdatabase/log"

log_filename = "%Y-%m-%d_%H.%M.log"

log_error_verbosity = VERBOSE
STEP 12. Create our environment for the database.
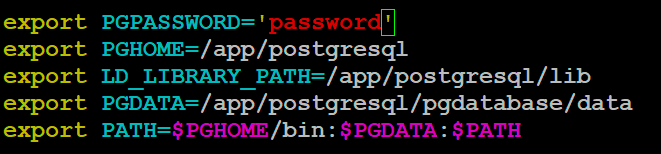
In /home/postgres create a pgsql.env file and add the following text to it:
export PGPASSWORD="password"

export PGHOME=/app/postgresql

export LD_LIBRARY_PATH=/app/postgresql/lib

export PGDATA=/app/postgresql/pgdatabase/data

export PATH=$PGHOME/bin:$PGDATA:$PATH
STEP 13. Start the database.
We use the newly created pgsql.env environment and launch the database with the utility:
pg_ctl start

The database has started successfully.
STEP 14. Bathhouse database management console.
The psql utility is used to manage the database.
psql

READY! Postgresql 14.1 installed and running successfully. I agree that this installation method is not very easy, but it gives us many options than we would install the base with rpm packages.
In the next article, I will show you how to set the database to auto start after a server reboot.
Thank you all, I hope my article was of some help to you.